
calogerosllc@gmail.com

DIY Guide: How to Make Your Own Sourdough Starter
Introduction:
Sourdough bread has gained popularity in recent years due to its unique flavor profile and potential health benefits. One of the key components that give sourdough bread its distinct taste and texture is the sourdough starter. A sourdough starter is a natural fermentation mixture of flour and water that captures wild yeast and beneficial bacteria, facilitating the leavening process. In this blog post, we will provide you with a step-by-step guide on how to make your own sourdough starter from scratch.
STEP BY STEP GUIDE:
Step 1: Gather Your Ingredients
To create a sourdough starter, you'll need only two simple ingredients:
- High-quality flour: Opt for organic, unbleached flour, such as bread flour, whole wheat, or rye flour. These types of flour contain more natural yeast and bacteria compared to highly processed options.
- Filtered water: Chlorine and other chemicals present in tap water can negatively affect the fermentation process. Using filtered or bottled water is recommended.
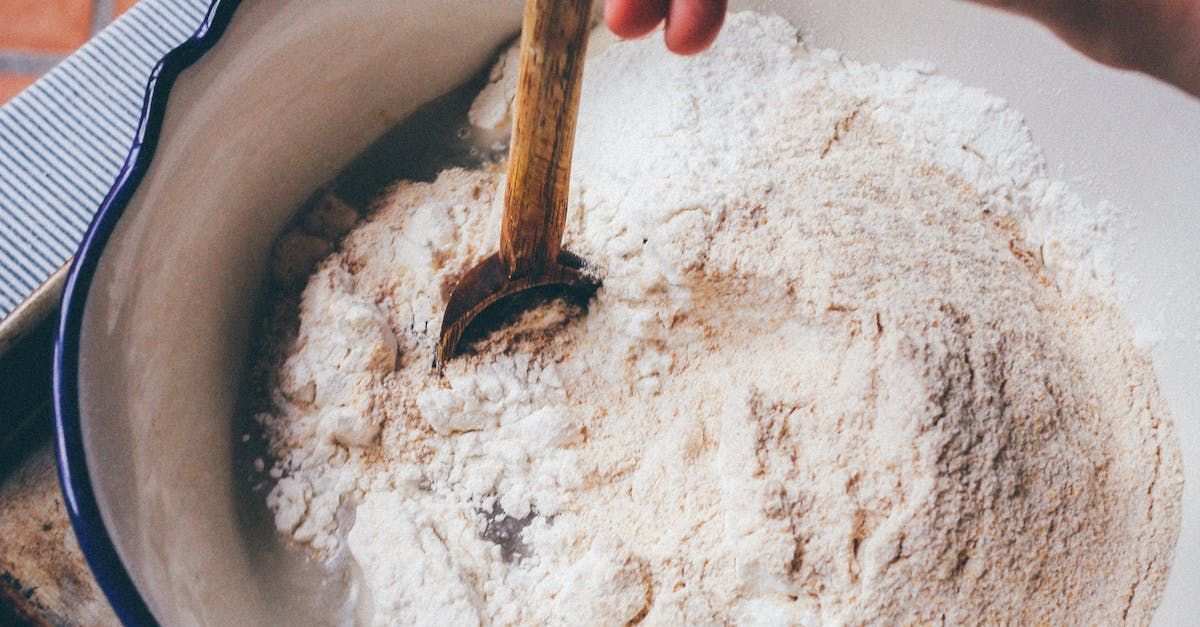
Step 2: Day 1 - Mixing the Initial Starter
1. In a clean glass jar or container, combine 100 grams (approximately 3.5 ounces) of flour with 100 milliliters (approximately 3.5 fluid ounces) of filtered water.
*note if using whole wheat or rye , I would split the ratio with bread flour 50/50, for example; 50g bread flour and 50g whole wheat or rye flour = 100g of total flour.
2. Stir the mixture thoroughly until there are no dry flour pockets remaining.
3. Cover the jar loosely with a clean kitchen towel or plastic wrap, allowing the mixture to breathe.
Step 3: Day 2 - Feeding the Starter
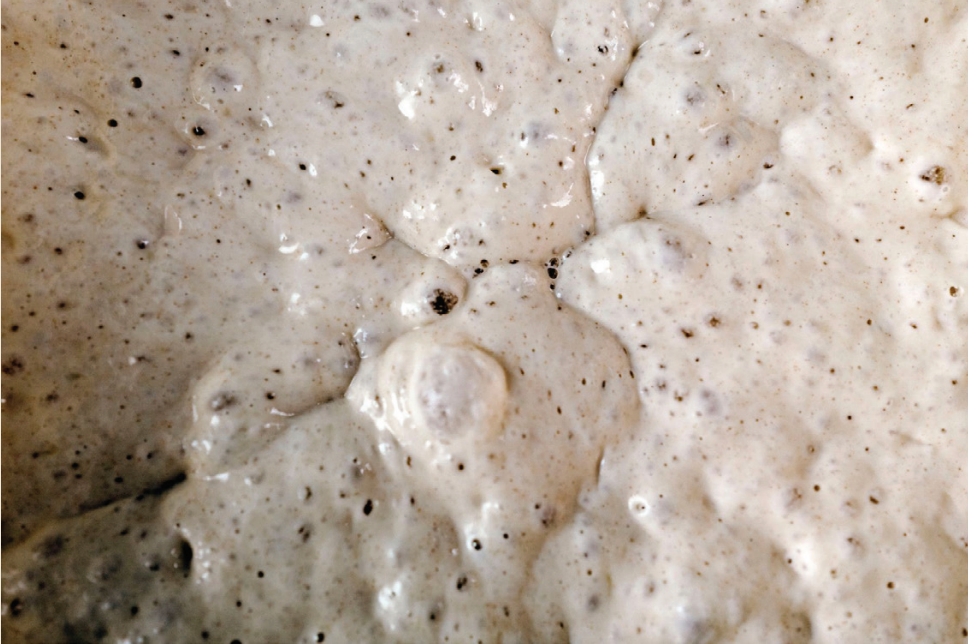
1. You may begin to see some bubbles forming on the surface of the mixture. This indicates that the yeast is becoming active.
2. Discard approximately half of the starter (about 100 grams) to prevent the mixture from overpowering and to maintain a manageable size.
3. Add 100 grams of fresh flour and 100 milliliters of filtered water to the jar.
4. Stir well and cover again.
Step 4: Daily Maintenance - Feeding and Care
1. Repeat the process outlined in Step 3 for the next few days, discarding and refreshing the starter at approximately the same time each day.
2. As the yeast population grows, you may start to notice a pleasantly sour aroma and an increase in bubbles. This indicates that your sourdough starter is thriving.
3. Maintain a consistent feeding schedule, preferably every 24 hours, to keep the starter healthy and active.
Step 5: Ready to Bake!
1. After approximately 7-10 days of regular feedings, your sourdough starter should be fully active and ready to use.
2. Before baking, it's important to do a float test. Take a small spoonful of the starter and drop it into a glass of water. If it floats, it indicates that there is enough carbon dioxide being produced by the yeast, and your starter is ready to use.
3. Be sure to set aside a portion of your starter as a "mother" or "seed" to maintain and continue growing your sourdough starter for future bakes.
Conclusion:
Making your own sourdough starter is a rewarding process that allows you to create delicious, homemade sourdough bread. Remember, patience and consistency are key when nurturing your starter. Once you have an active and healthy starter, you'll be able to bake beautiful loaves with distinct flavors and textures. Enjoy the journey of becoming a sourdough master in your own kitchen!
Photography by
MCV Image
Website by
ABN Circle
Location
Pizza Shop & Mobile Catering
931 W 75th Naperville, Illinois
Hours
- Sunday
- Closed
- Monday
- Closed
- Tuesday
- -
- Wednesday
- - -
- Thursday
- -
- Friday
- - -
- Saturday
- -